If you’ve opened Make.com for the first time and started browsing modules, you’ve probably seen the word “webhook” everywhere. It sounds technical. It sounds like something a developer would use. And if you’re a small business owner trying to automate your first workflow, it might feel like a barrier before you’ve even started.
Good news: webhooks are simpler than they sound. And once you understand them, you’ll use them in almost every automation you build.
The simplest explanation
A webhook is a URL that waits for data.
That’s it. When something sends data to that URL, your automation starts running. The webhook catches the data and passes it to the next module in your workflow.
Think of it like a mailbox. You set it up once, it sits there waiting, and when something arrives, it triggers an action. You don’t need to keep checking. The mailbox does the waiting for you.
Why webhooks matter in Make.com
Make.com automations need a starting point – something that says “go.” That starting point is called a trigger. There are different types of triggers (scheduled timers, email watchers, app-specific triggers), but webhooks are the most flexible one.
Why? Because a webhook doesn’t care where the data comes from. A form, a payment processor, another automation, a mobile app – if it can send an HTTP request, it can trigger your webhook. That makes webhooks the universal starting point for automations.
In the course, 5 out of 8 workflows start with a webhook. It’s the first thing you’ll learn to build, and you’ll keep using it in everything from simple contact forms to complex sales funnels.
How a webhook works – step by step
Here’s what happens when a webhook-triggered automation runs:
Step 1: You create a webhook in Make.com. It gives you a unique URL.
Step 2: You connect that URL to something that sends data – like a form builder (Tally, Typeform, Google Forms) or another app.
Step 3: Someone fills out the form (or the app sends data for any other reason).
Step 4: The form sends the submitted data to your webhook URL.
Step 5: Make.com receives the data and starts running your scenario.
Step 6: Each module after the webhook can use that data – the person’s name, email, answers, whatever was sent.
The key insight: you set this up once. After that, every form submission (or app event) triggers the automation automatically. No manual intervention needed.
Setting up your first webhook in Make.com
Let’s walk through it. This takes about 2 minutes.
1. Create a new scenario
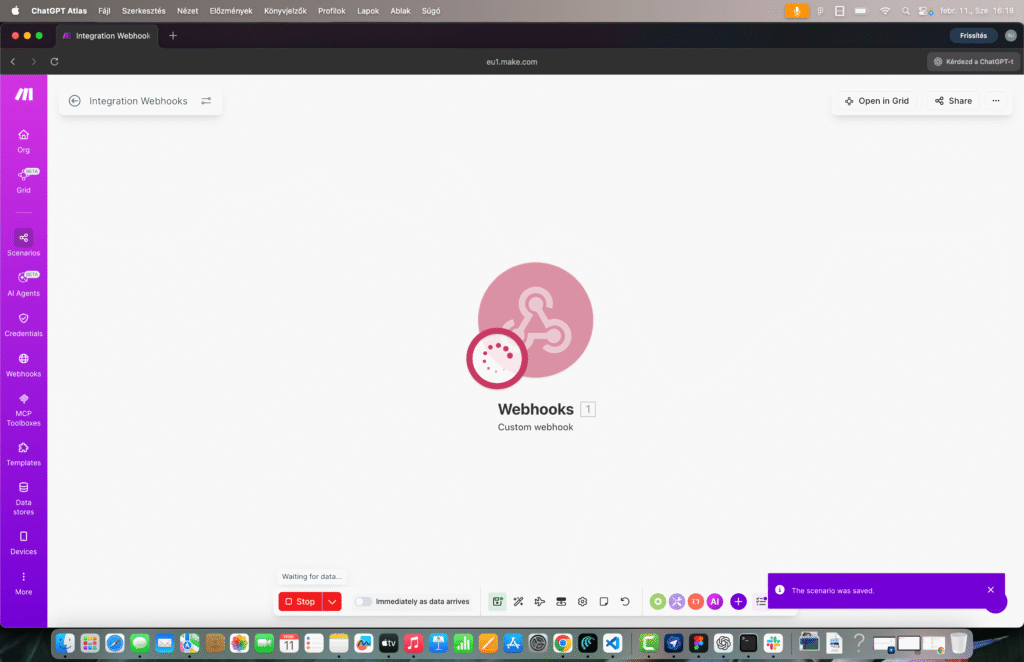
Open Make.com and click “Create a new scenario.” You’ll see an empty canvas with a plus icon in the center.
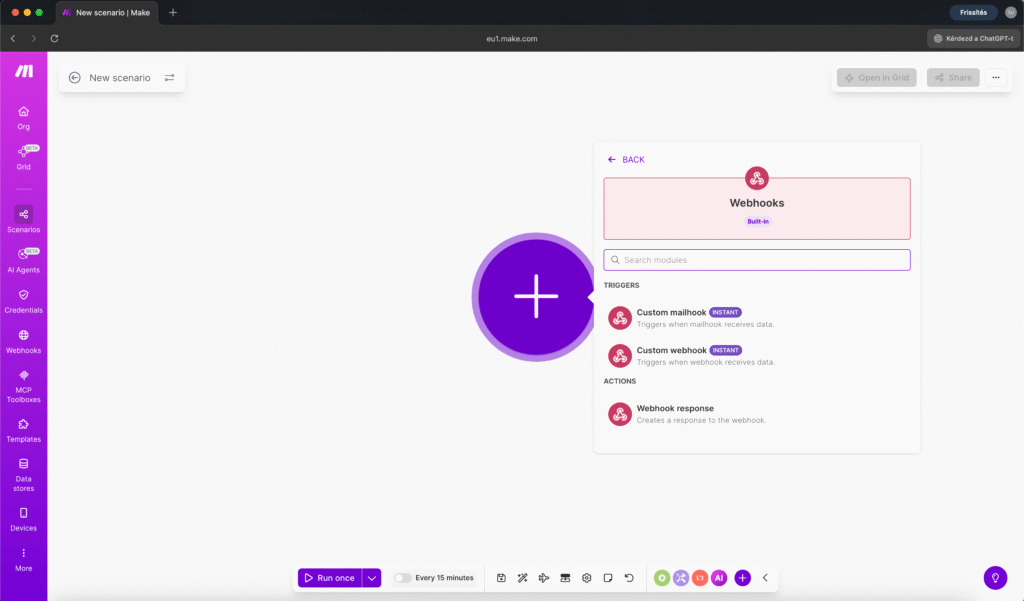
2. Add the Webhooks module
Click the plus icon, search for “Webhooks,” and select the Webhooks app (not a specific service – the generic Webhooks module).
Choose Custom webhook as the trigger type.
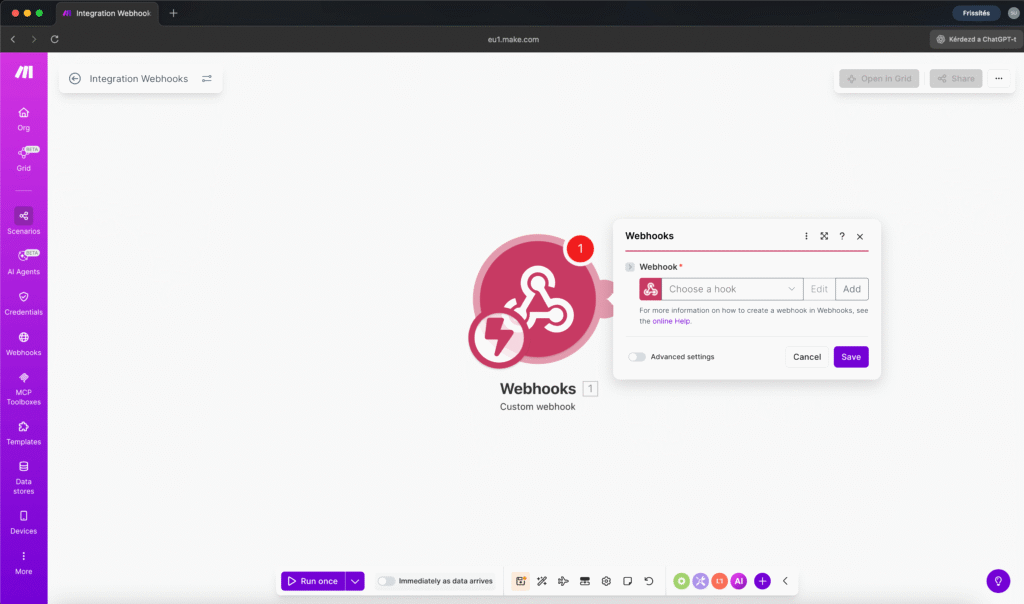
3. Create the webhook
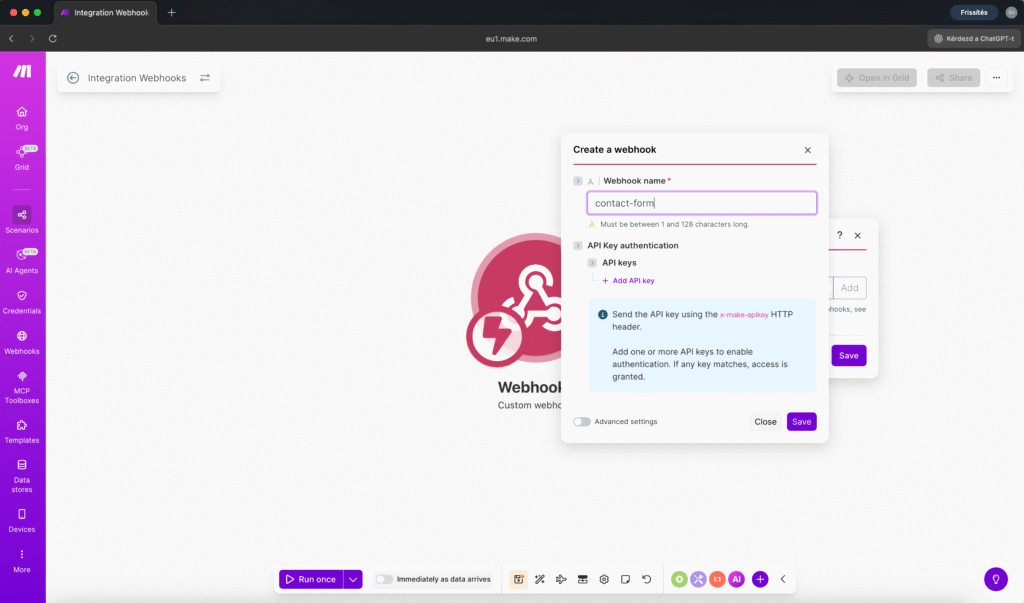
Click “Add” next to the webhook dropdown. Give it a name that makes sense – something like “contact-form” or “quiz-submission.” Click Save.
Make.com generates a unique URL. This is your webhook address.
4. Copy the URL
Click “Copy address to clipboard.” This is the URL you’ll paste into your form builder, payment processor, or whatever tool needs to send data to your automation.
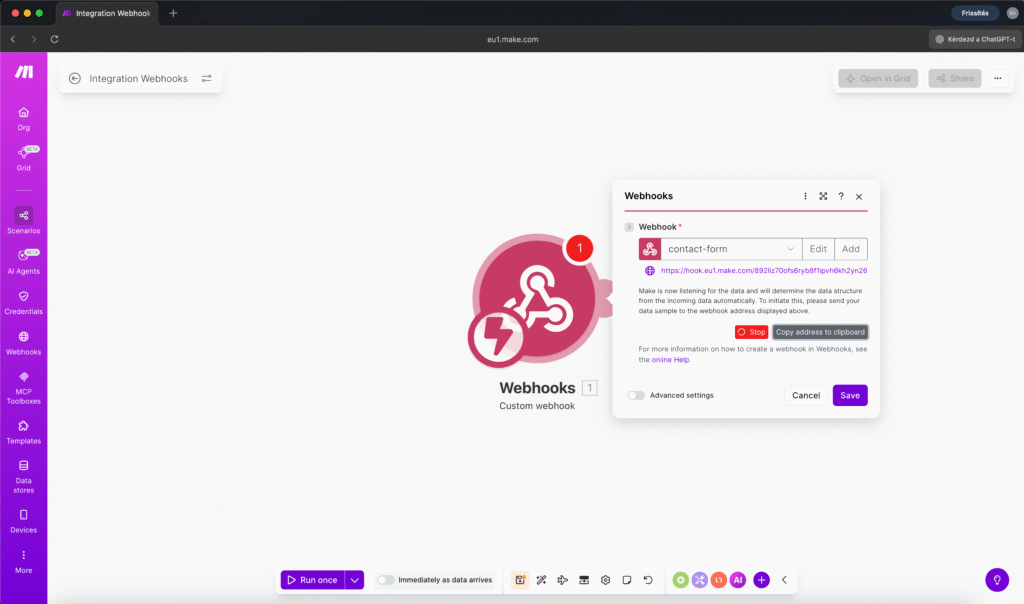
5. Send test data (determine data structure)
Before your webhook knows what data to expect, it needs to see an example. Click “Run once” in Make.com (bottom left), then go to your form and submit a test entry.
When the data arrives, Make.com shows “Successfully determined” and the webhook now knows the structure of incoming data – field names, types, everything.
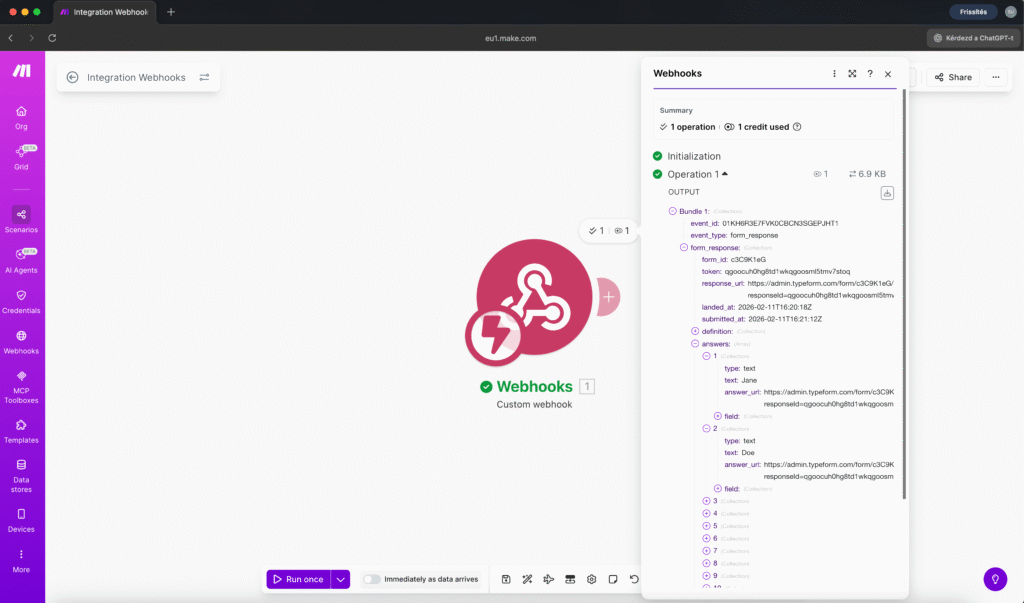
6. Use the data in the next modules
Now every module you add after the webhook can reference these fields. Click on any field in the next module, and you’ll see all the data your webhook received listed under the webhook module number.
That’s it. Your webhook is live and waiting for data.
Where to connect your webhook URL
The webhook URL needs to go into whatever tool sends the data. Here are the most common setups:
Tally forms: Open your form settings, go to “Integrations” or “Connect,” choose Webhook, paste your URL. Every form submission now triggers your Make.com scenario.
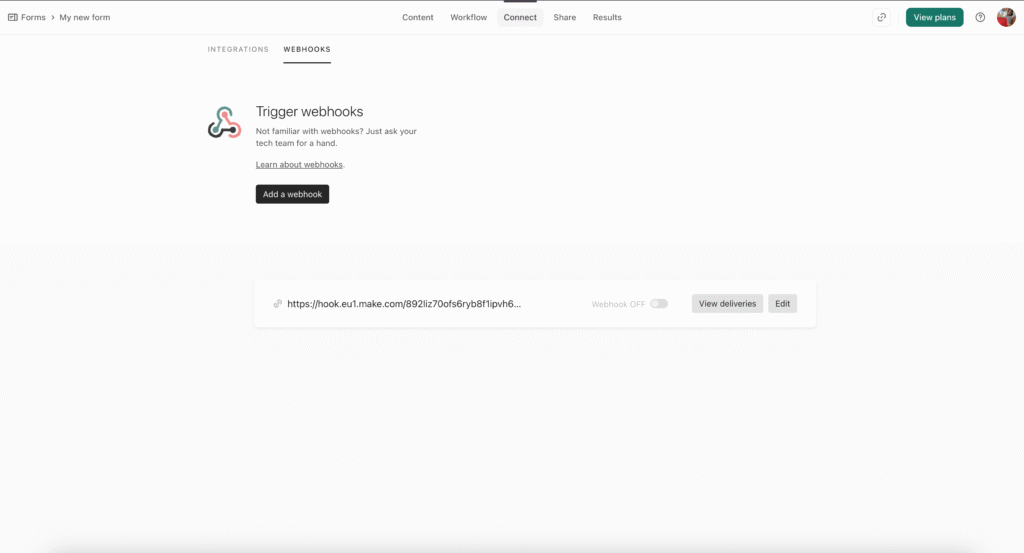
Typeform: Similar process – go to Connect, add a Webhook integration, paste the URL.
Google Forms: This one is slightly different. Google Forms doesn’t have a native webhook option, so you’d either use Make.com’s Google Forms module (which watches for new responses using a different trigger type) or use a Google Apps Script to forward submissions to your webhook. For beginners, the Google Forms module is easier.
Calendly: Uses its own trigger module in Make.com rather than a generic webhook – but the principle is identical.
Other tools: Any service that supports “webhook notifications” or “HTTP callbacks” can connect to your Make.com webhook URL. Payment processors like Stripe, e-commerce platforms like Shopify, CRM tools – they all support webhooks.
The “Replay” trick that saves you hours
Here’s something that will save you massive amounts of time when building and testing webhooks.
When you’re building a workflow, you need to test it repeatedly. Without the Replay feature, you’d have to fill out your form every single time you want to test. That gets old fast.
Instead, use Replay:
- Right-click on the webhook module (or click the three dots)
- Select the most recent bundle from the list
- Click “Run this module again”
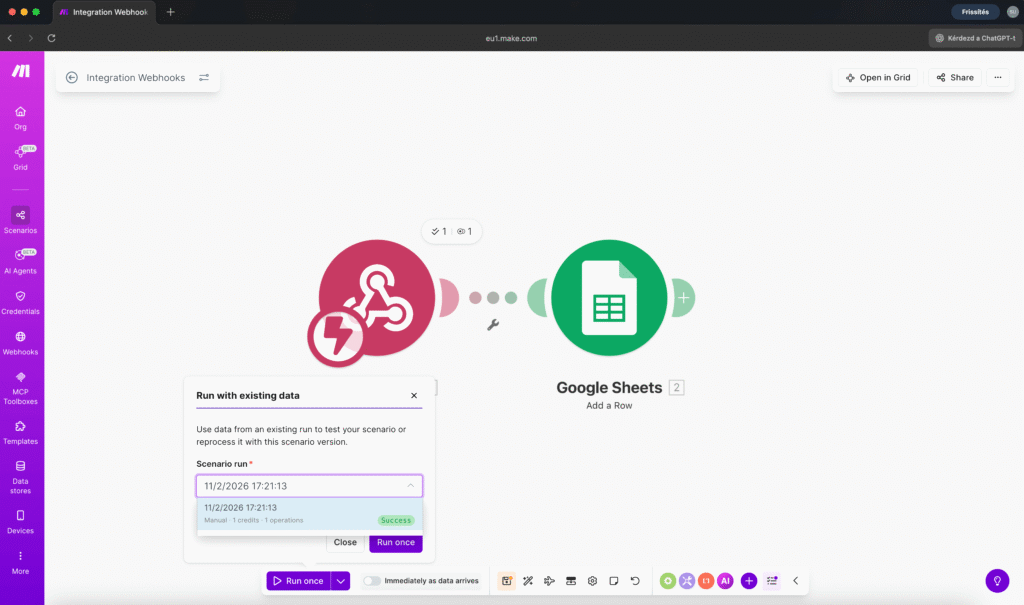
Make.com re-sends the same data through your entire scenario. You can test 20 times without filling out the form once.
This is especially valuable when you’re debugging modules further down the chain. Change a setting in module 5, replay from the webhook, and see if it works – all without touching the form.
Webhook vs. other triggers
Make.com has several trigger types. Here’s when to use which:
Webhook (Custom) – Use when you’re connecting a form or external service that can send HTTP requests. Instant – runs the moment data arrives. This is the most common trigger for form-based automations.
App-specific triggers (like “Gmail – Watch Emails” or “Calendly – Watch Events”) – Use when Make.com has a dedicated module for the service. These poll the service at intervals (every 5-15 minutes on the free plan) rather than responding instantly. The trade-off is simpler setup since you don’t need to configure the webhook URL manually.
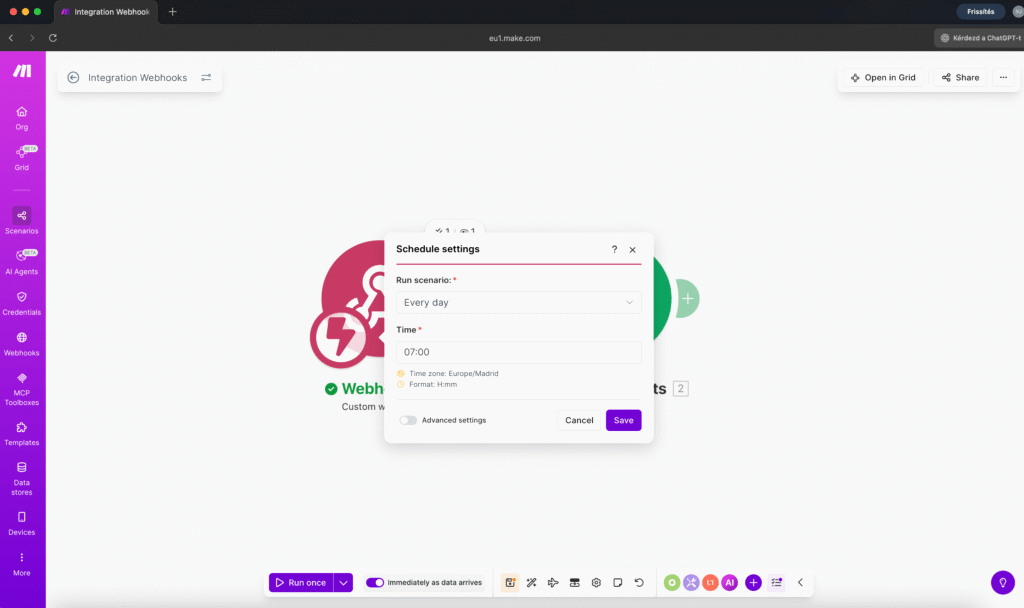
Schedule trigger – Use when you want your automation to run at specific times (every day at 9am, every Monday, etc.) regardless of external events. Good for report generation, content publishing, or batch processing.
For the workflows in the course: Workflows 1, 5, 6, and 8 use webhooks. Workflow 2 uses Gmail’s trigger. Workflow 3 uses Calendly’s trigger. Workflow 7 uses a scheduled trigger.
Common webhook mistakes (and how to avoid them)
Forgetting to click “Run once” before testing. If you send form data without Make.com listening, the data disappears. Always click Run once first, then submit your form.
Not determining the data structure. If you skip the test submission step, Make.com won’t know what fields to expect. You’ll see an empty variable list in subsequent modules.
Using the wrong webhook URL. Every webhook you create gets a different URL. If you have multiple scenarios, double-check that your form points to the correct one.
Leaving the scenario in “Run once” mode. After testing, make sure to toggle your scenario to “ON” (active) so it runs automatically. Run once is only for testing – it stops after one execution.
Not handling errors. What happens if your webhook receives unexpected data? In the early workflows this is fine to ignore, but as you build more complex automations (Workflow 6 and beyond in the course), you’ll learn to add error handling so your scenarios don’t break silently.
What data can a webhook receive?
Pretty much anything that can be sent as an HTTP request:
- Form fields (name, email, phone, dropdown selections, text areas)
- JSON data from APIs
- File references
- Numbers, dates, arrays
- Nested objects (like a form with repeating sections)
Make.com automatically detects the structure and makes every field available as a variable you can use in subsequent modules.
The most common format is JSON – which is what most form builders and APIs send by default. You don’t need to configure anything special for this. Make.com handles the parsing automatically.
Your first webhook automation
Ready to put this into practice? Here’s the simplest useful automation you can build:
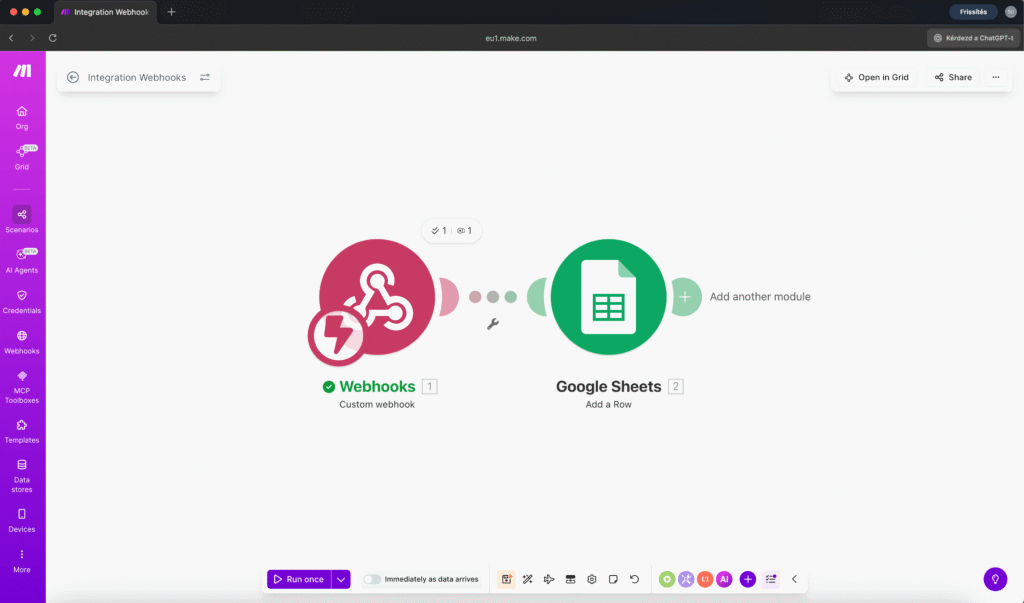
Smart Contact Form Response (3 modules, ~20 minutes)
Module 1: Webhook – catches the form submission (name, email, message)
Module 2: OpenAI – reads the customer’s message and writes a personalized response
Module 3: Email – sends the AI response to the customer automatically
This is Workflow 1 in the course. It’s 3 modules, runs on Make.com’s free tier, and turns a 10-minute manual task into a 10-second automated process.
The webhook is your entry point. Everything else builds from there.
Key takeaways
A webhook is a URL that receives data and triggers your automation. You create it in Make.com, connect it to a form or service, and your scenario runs every time new data arrives.
Once you understand webhooks, you understand the foundation of almost every automation. Forms, payment notifications, API callbacks – they all work the same way: data comes in through the webhook, and Make.com takes it from there.
If you want to build this from scratch with step-by-step guidance – including the common errors you’ll hit and exactly how to fix them – the Make.com Automation Course starts with this exact workflow. From 3 modules to 45, each building on what you learned before.

Susana Toth
Make.com Certified Expert & Founder, La Maquina Studio
Susana Toth is a Make.com Certified Expert and the founder of La Maquina Studio, where she helps small businesses and consultants eliminate repetitive work through smart automation. With 20+ years of experience in web design, business consulting, and digital strategy, she builds practical AI-powered workflows that save hours every week — without writing a single line of code. She writes about Make.com automation, AI integration, and building systems that work while you don’t.
Learn more about me →